

Part VI Techniques and Tools
Chapter 22
Knives and Whetstones
A sharp knife cuts fish without crushing its cells, and it leaves a clean, crisp cut surface. A dull knife needs more force, so it slips easily. It leads to injuries and contamination. In this chapter you will learn about the types of knives, the properties of steel, whetstones, how to sharpen a single-bevel knife, care and hygiene, and the rules for carrying knives.
In this chapter you will learn
- To explain the uses of the deba (heavy filleting knife), yanagiba (slicing knife), usuba (vegetable knife), gyuto (chef's knife), and other knives, and the difference between single-bevel and double-bevel knives
- To explain what the urasuki (hollow-ground back) does, and how to sharpen a single-bevel knife by raising a burr and removing it with uraoshi (flattening the back)
- To understand the difference between carbon steel and stainless steel and between whetstone grits, and to choose them to suit the knife
- To clean, disinfect, store, and carry knives correctly, from the standpoint of both hygiene and the law
- To explain how the sharpness of the edge relates to the crushing of cells, and the differences between shirogami, aogami, and honyaki (Grade 1)
22.1 Knives in the sushi restaurant
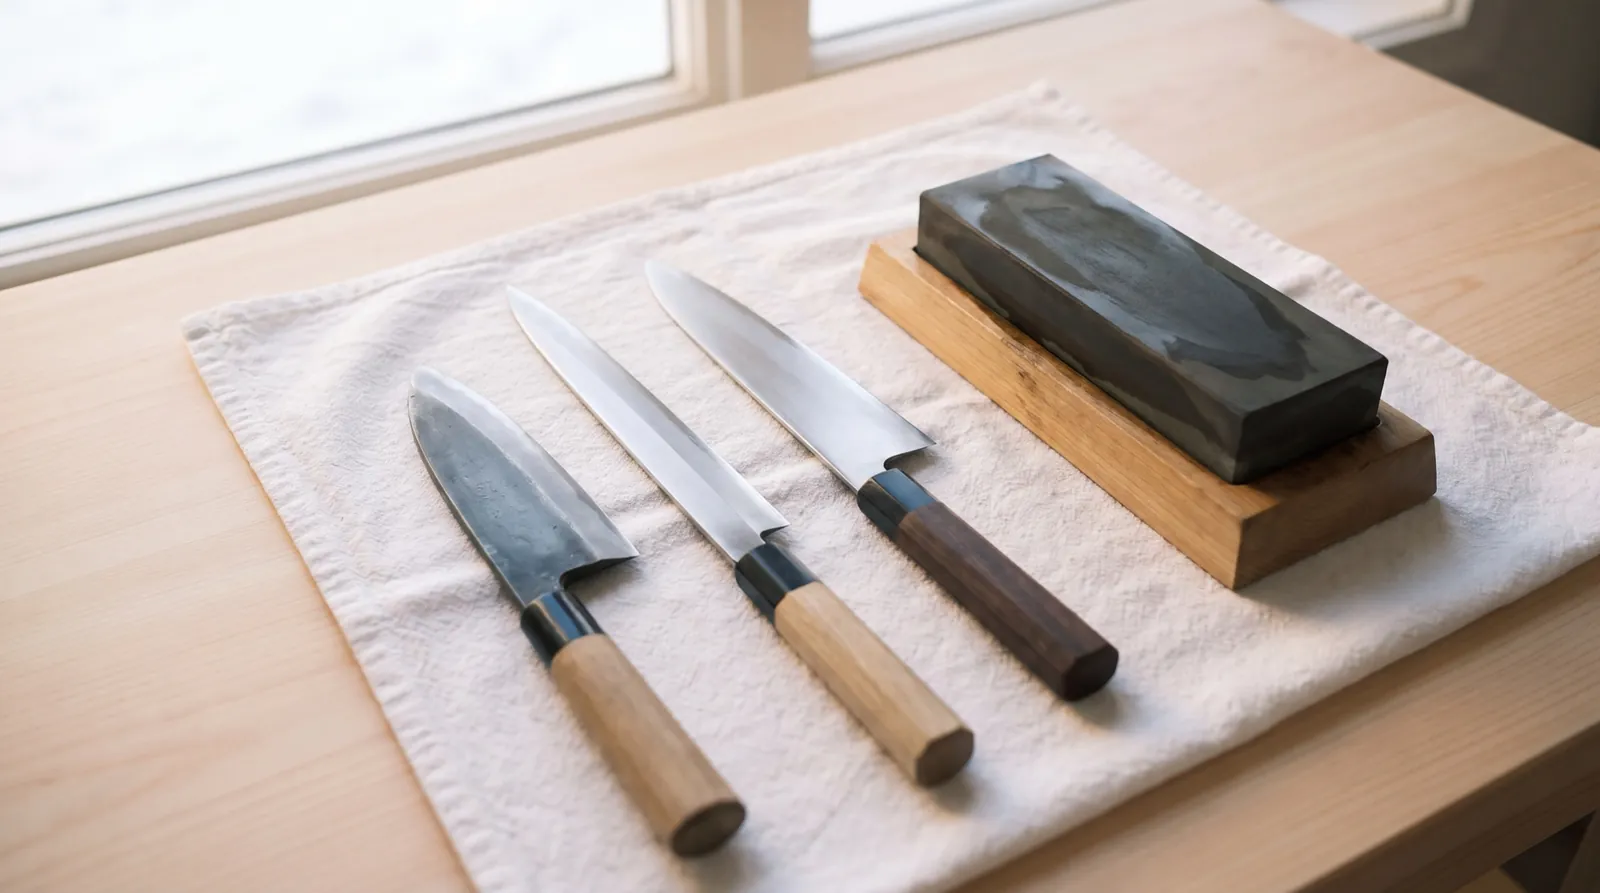
Most Japanese knives are single-bevel. Only one side of the blade has a slanted face, which is the face you press against the whetstone. This face is called the bevel (kireha). The other side is called the "back," and it is almost flat. Western knives, such as the gyuto, are double-bevel. They have a bevel on both sides.
Deba: cutting through bone and filleting
The deba is a heavy single-bevel knife with a thick spine. The spine is the back edge of the blade, opposite the cutting edge. You use the deba to cut off the head, to cut through the backbone, and to fillet a fish into three pieces. It is thick and heavy for a reason. When the blade hits bone, the weight of the blade absorbs the shock and keeps the edge from chipping.
Deba knives come in different sizes and thicknesses. The thickest, the hon-deba, is for fish with thick bones, such as red sea bream (madai) and Japanese amberjack (buri). The slightly thinner ai-deba is for medium-sized fish. The ko-deba and the aji-kiri are for small fish, such as horse mackerel and sardines. If you fillet small fish with a large deba, the tip goes past the bones and cuts away flesh. If you cut the bones of a large fish with a small deba, the edge chips. Matching the deba to the size of the fish protects both the yield and the life of the blade. The yield is the share of the fish you buy that ends up as usable flesh.
Yanagiba and takohiki: slicing in one stroke
The yanagiba is a long single-bevel knife for slicing sashimi and sushi neta (toppings). Slicing the topping is called "kiritsuke." The tip of the yanagiba is pointed like a willow leaf. At the tsukeba (the chef's work area behind the counter), a blade length of 270 to 300 mm is standard. The blade is long so that you can pull-cut a piece of topping in a single motion, from the heel of the blade to the tip. If the blade is too short, you have to push back partway through, and the cut surface becomes rough (Chapter 23). The takohiki is a knife for the same job, with a square, angular tip.
Usuba, gyuto, and petty knife
The usuba is a single-bevel vegetable knife with a thin, wide blade. You use it for katsuramuki (peeling a vegetable into one long, thin sheet), for thinly slicing ginger to make gari (pickled ginger), and for cutting ken (fine shreds of daikon radish). It is not used on fish. The gyuto and the petty knife are double-bevel Western knives. The gyuto is used widely for fish to be cooked, for meat, and for vegetables. The small petty knife is used for condiments, citrus peel, and fine work.
| Knife | Edge | Typical blade length | Main uses |
|---|---|---|---|
| Hon-deba | Single-bevel, thick | 165–210 mm | Removing heads, cutting through the backbone, three-piece filleting |
| Ko-deba, aji-kiri | Single-bevel | 90–135 mm | Small fish such as horse mackerel and sardines |
| Yanagiba, takohiki | Single-bevel, long | 270–300 mm | Slicing sashimi and sushi toppings, skinning |
| Usuba | Single-bevel, wide | 165–210 mm | Vegetables, katsuramuki |
| Gyuto | Double-bevel | 210–270 mm | Fish to be cooked, meat, vegetables |
| Petty knife | Double-bevel, small | 120–150 mm | Condiments, citrus, fine work |
The key point of this table is that the deba, which cuts bone, is short and thick, while the yanagiba, which slices toppings, is long, at 270 to 300 mm.
Choosing a knife: your build, the counter space, and your dominant hand
Choose the blade length of your yanagiba based on your build and the size of your tsukeba. A longer blade lets you slice in one stroke. But if you swing a yanagiba that is too long in a narrow tsukeba, it will hit dishes or the person next to you. As a rough guide, if you are about 170 cm tall, choose 270 mm. If you have long arms and a wide counter, choose 300 mm.
Left-handed chefs should use left-handed single-bevel knives throughout. The bevel of a single-bevel knife faces a fixed direction. If you slice with a right-handed knife in your left hand, the bevel faces the food. The blade then bites into the food, and the cut comes out curved.
Fugubiki and honesuki, and finer points of choosing a knife
The fugubiki is a knife like a yanagiba, but even thinner and narrower. Its light blade releases the flesh easily. It is used to slice usuzukuri, sashimi so thin you can see through it. It also suits usuzukuri of white-fleshed fish and of kawahagi (thread-sail filefish). The honesuki is a short, thick knife for taking flesh off the bone. It was originally a knife for meat. Some chefs use it instead of a deba to split the heads of large fish.
The ai-deba has a blade length of about 150 to 180 mm. It strikes a balance between the power to cut bone and the lightness to fillet. It is valuable in restaurants that fillet many medium-sized fish. The ko-deba has a blade length of about 105 to 135 mm, and the even smaller aji-kiri is about 90 to 105 mm. When you fillet dozens of small horse mackerel or kasugo-dai (young sea bream), these knives work like an extension of your hand. Choose a deba whose blade is long enough to span the body height of the largest fish you usually fillet. Judge the weight not by lifting the knife, but by how tired you feel after working with it on the cutting board for 5 minutes. A thick, heavy hon-deba makes cutting bone easy, but filleting a hundred small fish with it strains your wrist.
The standard handle is made of ho wood (Japanese magnolia). It is light, resists water, and does not get slippery when wet. The ring that tightens the joint between the blade and the handle is called the ferrule (kuchiwa). Water buffalo horn is considered the finest material. It cracks less easily than resin and lets in less water. In cross section, handles are octagonal or chestnut-shaped. An octagonal handle works in either hand. A chestnut-shaped handle has a bulge that fits a right-hand grip. Left-handed single-bevel knives are often made to order, so they cost more. Even so, the Association recommends using a knife made for your dominant hand. If you force yourself to get used to a right-handed knife, you will improve more slowly and have more accidents.
| Knife | Stone for the final finish | Reason |
|---|---|---|
| Deba (hon-deba, ai-deba, ko-deba) | Stop at a medium stone of about #1000 | Leaves a coarse edge that grips bone |
| Yanagiba, takohiki | Finishing stone, #3000–8000 | Makes the cut surface smooth and glossy |
| Fugubiki | Finishing stone, #5000 or higher | Slices thin enough to see through |
| Usuba | Finishing stone, about #3000 | Thin slicing of vegetables, katsuramuki |
| Gyuto, petty knife | Medium stone to #3000 | General use |
22.2 Single-bevel and double-bevel knives: what the urasuki does
A double-bevel knife is a symmetrical wedge. As the blade enters the food, the slopes on both sides push the food apart to the left and right. A single-bevel knife is an asymmetrical wedge. Only the bevel side pushes the food aside. The flat back pushes almost nothing. This shape gives sushi work three advantages.
First, the cut surface stays crisp. The cut surface against the back is not pushed aside, so it is cut away cleanly and straight. That is why the corners of the topping stand out sharply and the cells are not crushed. Second, you can skin fish. When you lay the flat back on the cutting board, the edge travels between the skin and the flesh, parallel to the board. You will learn skinning in Chapter 13. Third, you can slice thinly. The food moves away toward the bevel side, so the blade passes through without splitting the flesh, even for usuzukuri. The drawback is that the blade tends to drift toward the bevel side. To cut straight, you need the skill to control this tendency with your hand.
Urasuki
Hold the back of a single-bevel knife up to the light. You will see that the center is slightly hollow. This is the urasuki (hollow-ground back), a hollow that the blacksmith made on purpose. When you lay the back flat on a whetstone, only two areas touch the stone. One is a thin band along the edge. The other is the rim on the spine side. The thin band along the edge is called the itoura.
The urasuki has two functions. The first concerns sharpening. Because the contact area is small, a few light strokes on the back bring the whole edge evenly against the stone. The second concerns cutting. Most of the back does not stick to the food, so the sliced topping does not cling to the blade and comes away cleanly. The urasuki wears away a little each time you sharpen. If you grind the back too hard, it disappears. Above all, when you sharpen, protect the urasuki.
A knife that has lost its urasuki
With a double-bevel knife, the slope lifts the flesh. This makes it hard to skin a fish while leaving the silver skin layer (gin-kawa) on the flesh. In skinning, the skin slides smoothly away toward the cutting board. This also happens because the urasuki reduces friction. If you keep grinding the back hard and the urasuki disappears, the whole back becomes flat. Food then sticks to the blade, and every time you do uraoshi, you grind the entire back. Grinding the whole back flat is not a task you can really do. A single-bevel knife tends to drift toward the bevel side, even in katsuramuki or when you run the blade along bones. You use it by controlling this tendency with your hand.
22.3 Carbon steel and stainless steel
The blades of Japanese knives are made mainly of carbon steel or stainless steel. Carbon steel is iron with added carbon, and chefs call it "hagane," meaning steel. Stainless steel is steel with added chromium so that it rusts less easily. Carbon steel takes a very sharp edge and is easy to sharpen. But it is weak against water, salt, and acid, and it rusts if you leave it wet. Carbon steel comes in grades known as "shirogami" (White Paper steel) and "aogami" (Blue Paper steel). Shirogami takes a sharp edge and is easy to sharpen. Aogami holds its edge well. Stainless steel resists rust, but it falls slightly short in how sharp it gets and in how well it bites the stone.
Most Japanese knives are built in a style called awase (laminated). Hard steel on the edge side is joined to softer iron on the spine side. This softer iron is called nantetsu, or soft iron. The soft iron absorbs shock, so the knife chips less easily and is easier to sharpen. A knife whose whole blade is made of steel is called honyaki (single-steel). It holds its edge extremely well, but it takes a long time to sharpen and can crack if you drop it. We recommend that you first learn to sharpen a laminated knife well on your own. Honyaki is a tool to choose once your sharpening skill has caught up.
Inside the steel: shirogami, aogami, kasumi, honyaki, and hardness
The carbon steel in Japanese knives contains about 1 to 1.4% carbon. Shirogami and aogami were originally product names of a steelmaker's grades, and they became the common names. Shirogami is carbon steel with as few impurities as possible. It takes a sharp edge and is easy to sharpen, but it wears down a little faster. Aogami is shirogami with chromium and tungsten added. It resists wear and holds its edge well, but it feels a little hard on the stone. Chefs who sharpen every day choose the sharpness of shirogami. Chefs who have little time to sharpen choose the edge retention of aogami. In recent years, high-grade stainless steel has improved, and more chefs are choosing stainless steel for their yanagiba.
When you sharpen a laminated knife, the steel shines like a mirror, and the soft iron looks hazy. That is why laminated knives are also called kasumi, meaning "haze." When you sharpen, the soft iron wears away first and exposes the steel edge, which makes sharpening easy. Honyaki is made like a Japanese sword. Only the edge is hardened by quenching, and the spine side is left softer. The edge resists warping, so honyaki suits a long yanagiba. But the whole blade is hard, so it does not bite the stone well.
The hardness of a blade is expressed by a number called HRC (Rockwell hardness). The steel of Japanese knives is about HRC 60 to 65. The harder the steel, the longer it stays sharp, but the less tough it becomes. So it chips more easily from sideways force or from the impact of hitting bone.
| Type | Sharpness and ease of sharpening | Edge retention | Rust | Chipping | Best for |
|---|---|---|---|---|---|
| Shirogami (carbon steel) | The sharpest; easy to sharpen | Standard | Rusts easily | Resistant if laminated | Chefs who sharpen every day |
| Aogami (carbon steel) | Sharp; a little hard on the stone | Good | Rusts easily | Resistant if laminated | Chefs who want longer between sharpenings |
| Stainless steel | Slightly less sharp; bites the stone poorly | Good | Resistant | Depends on the material | Hot, humid places; work outside Japan |
| Awase (kasumi) | Easy to sharpen | Standard | Depends on the material | Soft iron absorbs shock | The basic choice for every chef |
| Honyaki | Takes a long time to sharpen | Very good | Depends on the material | Can crack | Chefs who have mastered sharpening |
22.4 Whetstones
The coarseness of a whetstone's grit is shown by its grit number. It is the number after the "#" sign, and the higher the number, the finer the grit. You shape the edge on a coarse stone and refine the edge on a fine stone. Remember the grit numbers in three groups. Coarse stones are #200 to 400, medium stones are #800 to 1500, and finishing stones are #3000 to 8000.
| Type | Grit | Use | How often |
|---|---|---|---|
| Coarse stone (arato) | #200–400 | Repairing chips; restoring an edge that has not been sharpened for a long time | Only when needed |
| Medium stone (nakato) | #800–1500 | Daily sharpening. Restores sharpness and shapes the edge. Final finish for the deba | Deba: daily to once every few days |
| Finishing stone (shiageto) | #3000–8000 | Removes the scratches from the medium stone and smooths the edge. Final finish for the yanagiba and usuba | Yanagiba: when it loses sharpness |
| Flattening the stone | Diamond plate or a dedicated flattening stone | Keeps the stone's surface flat | Every time before sharpening |
If you look at a sharpened edge under a microscope, you see a row of fine teeth, like the teeth of a saw. These tiny teeth catch the food and cut it. The finer the grit, the smaller the teeth, and the smoother and glossier the cut surface. The coarser the grit, the larger the teeth. They grip skin and bone well, but the cut surface is rough. That is why you stop at about #1000 for the deba, which cuts bone, and leave it with a "coarse edge." For the yanagiba, which slices toppings, you refine the edge on a finishing stone to make the cut surface shine.
Today the standard for sharpening is the synthetic whetstone. Some types must be soaked in water before use until no more bubbles come out. Other types can be used just by wetting the surface. Follow the instructions on the product.
Flattening the stone: the foundation of sharpening
The more you use a whetstone, the more its center becomes hollow. If you sharpen on a hollow stone, the angle changes depending on where the blade touches. The edge becomes rounded, or some parts do not get sharpened at all. When sharpening goes wrong, the cause is often not your skill but the surface of the stone. Making the stone flat again is called flattening the stone. Draw a grid in pencil on the surface of the stone, and rub it with a flattening stone. When all the lines are gone, you can see that the surface is flat. Ideally, flatten the stone every time before you sharpen.
After use, rinse the metal particles off the stone. Dry it in a shady place with good airflow before putting it away. Do not use a cracked stone, because it can break in the middle of sharpening.
Natural whetstones, ultra-fine finishing, and finer points of stone care
A natural whetstone is stone cut from a mountain. It has no grit number, and each stone differs in hardness and fineness. As you sharpen, its particles break down and become finer. So when you use it for finishing, it gives a distinctive hazy luster. Natural stones are expensive and vary in quality, and you do not need one from the start.
Some chefs finish their yanagiba to a mirror shine on an ultra-fine stone of #10000 or higher. The cut surface shines well, but the teeth on the edge are so small that the edge grips less. When fat or bits of food get into the teeth, the edge dulls quickly. The price is the extra work of wiping the blade after every cut.
For a stone that needs soaking, soak it for about 10 to 20 minutes. If you leave a stone meant only for surface wetting in water for a long time, the material that binds its particles breaks down, and the stone may crack. If you seal a stone while it is wet, mold grows. If you keep it where it can freeze, it cracks. Once it is dry, wrap it in cloth or put it in a box, and keep it out of direct sunlight and away from changes in temperature. To flatten the stone, use a diamond plate or a dedicated flattening stone, and rub the whole surface against it.
22.5 Basic sharpening
The most important point in sharpening a single-bevel knife is this: lay the bevel flat against the stone, and do not change that angle until you finish. If the bevel itself sits flush on the stone, you reproduce the angle that the blacksmith made. If the angle drifts, the stone may not reach the edge, or a small extra angle may form at the very edge, and the knife will cut less well.
- Prepare If the stone needs soaking, soak it in water until no more bubbles come out. Flatten the stone, set it on a non-slip base, and wet the surface.
- Get into position Hold the handle in your right hand. Put your index finger on the spine and your thumb on the flat of the blade. With 2 or 3 fingers of your left hand, press on the part you are sharpening, and keep the bevel flat against the stone. Lock the angle of your wrist.
- Sharpen the front (the bevel) Divide the blade into 3 or 4 sections, and sharpen them in order from the tip to the heel. Apply pressure as you push, and relax as you pull back. Use the same number of strokes and the same pressure on each section, and use the whole surface of the stone. The slurry that forms on the stone helps the sharpening, so do not rinse it away.
- Check for the burr Gently stroke the edge on the back side with the pad of your thumb, moving at a right angle to the edge. Never stroke along the edge. A slight catching feeling is the burr. It is metal at the edge that was pushed over to the back when you sharpened the front. It proves that the stone has reached the edge. Keep sharpening the front until a burr forms along the whole length of the blade. Any section without a burr is not yet sharpened.
- Uraoshi Turn the knife over. Lay the back completely flat on the stone, and draw it a few times with light pressure. This is called uraoshi (flattening the back). Thanks to the urasuki, only the itoura and the rim on the spine side touch the stone. This removes the burr and finishes the edge. Pressing hard crushes the urasuki, so do about 2 to 5 strokes at a time.
- Repeat on the finishing stone Repeat the same steps on the finishing stone, with even lighter pressure.
- Check and wash Check the finished edge. Then wash and dry the knife and the stone. Do not leave any stone slurry on the blade.
For double-bevel knives such as the gyuto and the petty knife, you do not lay the back flat. You sharpen both sides at the same angle and with the same number of strokes, so that they match.
How to check the finished edge
There are three ways to check. The first is paper. Hold a sheet of newspaper up with one hand, set the edge against it, and draw the knife lightly. Look for any place where it snags. The second is your thumbnail. Rest the edge lightly on your thumbnail at an angle and slide it. If it bites and stops, it is sharp. A rounded edge slides. The third is light. Point the edge toward a light. A sharp edge has no width, so it does not reflect light. If you see a white, shiny spot or line, that is where the edge is rounded or chipped. Do each check along the whole length of the blade.
How often to sharpen
The deba cuts bone, so its edge dulls quickly. In a restaurant with a lot of advance preparation (shikomi), sharpen it on a medium stone every day, or at least once every few days. The yanagiba does not dull much from slicing toppings alone, as long as you do not rub it against the cutting board. A habit of stopping the cut by striking the edge on the board shortens the life of a yanagiba. So does a habit of scraping the board with the blade when you gather sliced toppings. When the yanagiba loses its sharpness, restore it on the finishing stone alone. When that no longer works, start again from the medium stone.
Flat sharpening, the convex edge, and wear from sharpening
Sharpening with the bevel flat and flush on the stone is called flat sharpening. Sharpening with a very slight curve toward the edge is called a convex edge (hamaguri-ba). The deba hits bone, so you give it a slightly convex edge to make the edge stronger. For the yanagiba, it is usual to sharpen it close to flat, so that it does not split the food. If you hold the blade too low, only the upper part of the bevel is ground, and the stone does not reach the edge.
Every time you sharpen, the blade wears down. Even a wide yanagiba becomes narrow after ten or twenty years. A knife worn down by sharpening is a chef's pride, and you can use it as long as there is blade left.
Drip contains amino acids, sugars, and water, and a crushed cut surface also exposes more area to room temperature. People in the trade say that many of the cuts chefs suffer happen with a dull knife and wet hands.
22.6 Care, hygiene, and carrying knives
Wash right after use, and dry right away
Carbon steel rusts when the iron comes into contact with water and oxygen. Salt and acid speed it up. Acid here means vinegar, citrus, and fish blood. Right after use, wash the knife with neutral detergent and a sponge, and wipe off the water with a dry cloth.
The place where dirt is most likely to remain is not the blade but the joint between the handle and the blade. In a Japanese knife, the base of the blade is simply inserted into a wooden handle. It is not sealed. This base is called the tang (nakago). If blood or water gets into the joint, the tang rusts inside, bacteria grow, and the handle comes loose. Clean the joint with a brush, and do not leave the knife soaking in water. Do not use a dishwasher. It rusts the steel, cracks the handle, and damages the edge.
Disinfection and separating knives by task
Disinfect only after you have removed the dirt with detergent (Chapter 4). Alcohol of about 70% does not harm the blade. But any moisture left behind causes rust, so wipe the blade with a clean, dry cloth. Disinfecting with hot water basically means 80°C or higher for 5 minutes or longer, and it works on the blade. But if you soak the wooden handle for a long time, the handle cracks and hot water gets in at the joint. The practical way is to pour hot water over the blade and dry it right away. Sodium hypochlorite rusts steel badly, so never use it on knives.
Separating knives by task follows the same idea as preventing cross-contamination (Chapter 4). The deba you use in the scaling and gutting (mizu-arai) stage, where you handle scales and guts, must not be mixed on the same cutting board with the yanagiba you use in the clean stages, from cutting saku blocks onward. A saku is a trimmed block of fillet. In a restaurant that cannot keep them separate, clean the knives, cutting board, and hands each time the stage changes. Disinfect them with hot water or alcohol before moving on.
Storing and carrying knives
Store knives in a dry place where the blades do not touch other metal. If you put a bare knife in a drawer, the blade chips and you cut your hand. When you will not use a knife for a long time, coat the blade thinly with camellia oil or cooking oil, and wrap it in newspaper.
When you carry a knife, put it in a saya (knife sheath) or a dedicated case that covers the blade completely. A saya is a wooden cover for the blade. If you put the knife in the saya while it is wet, it rusts inside, so dry it before you sheathe it.
In Japan, the Swords and Firearms Control Law governs carrying bladed tools. It prohibits carrying a bladed tool with a blade longer than 6 cm without a legitimate reason, such as work. Carrying knives in a case directly to and from work, or to have them sharpened, counts as a legitimate reason. Leaving them in your car, or taking them into a restaurant or bar on a detour, is unlikely to be accepted as a legitimate reason. Many other countries have similar rules. You cannot take knives into an airplane cabin, so pack them in your checked baggage.
Finer rules for the prep area and the tsukeba
When a handle comes loose, have it refitted or replace it. The handle wears out before the blade does. As far as possible, also keep separate knives for food eaten raw and food to be cooked, and for fish and vegetables. Do not cut fish with the usuba meant for vegetables, and do not cut pickles with the yanagiba meant for fish.
Change the cloths at the tsukeba at least once an hour. Bleach and sanitize used cloths in sodium hypochlorite, then dry them (Chapter 4). Wash the deba in the prep area after filleting each fish. At the very least, wash it each time you change to a different kind of fish, and do not let a blade with blood from the blood line (chiai) on it touch the next fish. A knife you sharpened after service should be washed and wiped once more the next morning before you start making nigiri.
Light rust comes off if you rub it with cleanser on a cork or on a scrap of daikon. Rub along the length of the blade. Rubbing crosswise toward the edge damages the blade. Deep rust makes small pits, and these cause the edge to chip even after sharpening. It is important to stop rust while it is still just a dark stain. If you rinse the knife with water at about 60°C, the remaining heat helps it dry quickly.
For storage, a knife stand or a magnetic rack that lets knives dry quickly works well. When you carry knives outside Japan, keep them in a case and limit carrying to trips to and from work, so that you can explain that they are work tools. Left-handed single-bevel knives are almost impossible to find outside Japan, so buy a full set, including spares, in Japan before you leave. Tap water with a lot of chlorine speeds up rust, so always wipe knives thoroughly after washing.
Chapter summary
- The deba is a thick single-bevel knife for cutting bone and filleting. The yanagiba and takohiki are long single-bevel knives for slicing in one stroke. The usuba is for vegetables. Match the deba to the size of the fish, and match the yanagiba to your build and the size of your counter.
- With a single-bevel knife, only the bevel side pushes the food aside. So the cut surface stays crisp, you can skin fish, and you can slice thinly. Because of the urasuki, only the itoura and the rim on the spine side touch the stone when you lay the back on it. Do not crush the urasuki when you sharpen.
- Carbon steel is sharp and easy to sharpen but rusts easily. Stainless steel resists rust. Coarse stones are #200 to 400, medium stones are #800 to 1500, and finishing stones are #3000 to 8000. Flatten the stone before you sharpen.
- Sharpen a single-bevel knife with the bevel flat against the stone, without changing the angle. Raise a burr along the whole length of the blade, then remove it with uraoshi. Do uraoshi flat, lightly, and as little as possible.
- A dull knife slips and causes injuries. It crushes cells and squeezes out drip, which contaminates the cutting board and the next topping. Wash knives right after use and dry them right away, and never use sodium hypochlorite on knives. In Japan, the law prohibits carrying a bladed tool with a blade longer than 6 cm without a legitimate reason.
- A dull edge is wider, so it does not give enough pressure. You push harder, and cells are crushed before they tear. Shirogami is sharp, aogami holds its edge well, and honyaki holds its edge well but is hard to sharpen. The hardness of the steel is about HRC 60 to 65 (Grade 1).
Review questions
Q1 When you sharpen a single-bevel knife, what is the purpose of "uraoshi"? Choose the correct answer.
a To put an angle on the whole back and make the blade thinner
b To remove the metal pushed over to the back of the edge when you sharpened the front (the burr), and to finish the edge
c To grind away the hollow in the back (the urasuki) and make the back flat
d To remove rust from the blade
e To flatten the surface of the whetstone
Answer: b
When you sharpen the front (the bevel), metal at the edge is pushed over to the back and forms a burr. When you lay the back flat on the stone and draw it lightly, only the itoura and the rim on the spine side touch the stone, thanks to the urasuki. This removes the burr and finishes the edge. Choice a ruins the shape of the blade. In choice c, the urasuki is something to protect. If you grind it away, the knife becomes harder to sharpen, and food sticks to the blade. Choice d is rust care, and choice e is flattening the stone. Both are separate tasks.
Q2 Which statement about knife care and hygiene is correct?
a The best way to disinfect a knife is to soak it in sodium hypochlorite
b Dirt remains most in the middle of the blade, so you do not need to wash the joint between the handle and the blade
c Washing Japanese knives in a dishwasher is good because the high temperature disinfects them
d Do not mix the deba used in the scaling and gutting stage with the yanagiba used from cutting saku blocks onward on the same cutting board
e A carbon steel knife rusts less if you put it in its saya while still wet
Answer: d
The scaling and gutting stage, where you handle scales and guts, has many bacteria. From cutting saku blocks onward, the stages are clean, and you handle only flesh that goes into the guest's mouth. When you cannot keep them separate, wash and disinfect the knives, cutting board, and hands where one stage ends and the next begins. In choice a, sodium hypochlorite rusts steel badly. Choice b is the opposite of the truth: the joint is where dirt remains most. In choice c, a dishwasher rusts the steel and cracks the handle. In choice e, the knife rusts inside the saya.
Q3 When you cut fish with a dull knife, drip flows more easily from the cut surface. Which is the most appropriate reason?
a A dull blade creates a lot of friction heat, which raises the temperature of the flesh and melts the cells
b The edge has widened, so the same force does not give enough pressure. You push harder, and the cells are squeezed before they tear, so the cell membranes break
c A dull blade has rust on it, and the rust dissolves the cell membranes
d A dull blade has a deeper urasuki, so the flesh sticks to the blade and is torn off
e With a dull blade, the teeth on the edge become too fine, so the cut surface becomes like a mirror
Answer: b
Cutting means concentrating force on the thin line of the edge to tear tissue. When the edge rounds off and widens to 10 µm or 20 µm, the same force does not give enough pressure, and the chef pushes harder. The cells are then squeezed before they tear, the cell membranes break, and the liquid inside flows out. In choice a, the friction heat is very small. Choices c, d, and e are not true.